Monthly Archives

May 2018

Debugging ONAP OOM Failures

By Blog

Originally published on Aarna Networks, republished with permission.

On May-21, Amar Kapadia & I conducted a webinar on the topic of “Debugging OOM Failures”.

We started off by giving some context. Our objective was to develop a lightweight, repeatable lab environment for ONAP training on Google Cloud. We also plan to offer this image to developers that need a sandbox environment. To accomplish this, we used ONAP Amsterdam along with OPNFV Euphrates. ONAP was installed using OOM that uses Kubernetes and Helm. All of this software was installed on one VM on the Google cloud.

For most users, issues that pop up once in a while are OK. However, for us, the deployment process needed to be consistent and repeatable. For this reason, we had to debug every intermittent failure and develop a single-click workaround script.

The webinar next talked about the 7 issues we faced, how we debugged them and what the workarounds were. The issues faced were as follows. Other than failure#7, the other failures were all intermittent:

  1. AAI containers failed to transition to Running state

  2. SDC UI is not getting loaded

  3. SDC Service Distribution Error

  4. VID Service Deployment Error

  5. VID ADD VNF Error

  6. SDNC User creation failed

  7. Robot init_robot failed with missing attributes

If you are curious to learn more, check out the slide deck or video links above. Additionally if you have ONAP training, PoC needs, or simply feel like trying out the VM image on GCP, feel free to contact us. We have a whole portfolio of training, services and product offerings.

Orchestrating Network Services Across Multiple OpenStack Regions Using ONAP (Part 2/2)

By Blog

Originally published on Aarna Networks, republished with permission.

In the previous installment of this two part blog series, we looked at why NFV clouds are likely to be highly distributed and why the management and orchestration software stack needs to support these numerous clouds. ONAP is one such network automation software stack. We saw the first three steps of what it takes to register multiple OpenStack cloud regions in

ONAP for the vFW use-case (other use cases might need slight tweaking).

Let’s pick up where we left off and look at the remaining steps 4-7:

Step 4: Associate Cloud Region object(s) with a subscriber’s service subscription
With this association, this cloud region will be populated into the dropdown list of available regions for deploying VNF/VF-Modules from VID.

Example script to associate the cloud region  “CloudOwner/Region1x” with subscriber “Demonstration2” that subscribes to service “vFWCL”:

curl -X PUT \  https://<AAI_VM1_IP>:8443/aai/v11/business/customers/customer/Demonstration2/service-subscriptions/service-subscription/vFWCL/relationship-list/relationship \

 -H ‘accept: application/json’ \

 -H ‘authorization: Basic QUFJOkFBSQ==’ \

 -H ‘cache-control: no-cache’ \

 -H ‘content-type: application/json’ \

 -H ‘postman-token: 4e6e55b9-4d84-6429-67c4-8c96144d1c52’ \

 -H ‘real-time: true’ \

 -H ‘x-fromappid: jimmy-postman’ \

 -H ‘x-transactionid: 9999’ \

-d ‘ {

   “related-to”: “tenant”,

   “related-link”: “/aai/v11/cloud-infrastructure/cloud-regions/cloud-region/CloudOwner/Region1x/tenants/tenant/<Project ID>”,

   “relationship-data”: [

       {

           “relationship-key”: “cloud-region.cloud-owner”,

           “relationship-value”: “CloudOwner”

       },

       {

           “relationship-key”: “cloud-region.cloud-region-id”,

           “relationship-value”: “<Cloud Region – should match with physical infra>”

       },

       {

           “relationship-key”: “tenant.tenant-id”,

           “relationship-value”: “<Project ID>”

       }

   ],

   “related-to-property”: [

       {

           “property-key”: “tenant.tenant-name”,

           “property-value”: “<OpenStack User Name>”

       }

   ]

}’

Step 5: Add Availability Zones to AAI
Now we need to add an availability zone to the region we created in step 3.

Example script to add OpenStack availability zone name, e.g ‘nova’ to Region1x:

curl -X PUT \

https://<AAI_VM1_IP>:8443/aai/v11/cloud-infrastructure/cloud-regions/cloud-region/CloudOwner/Region1x/availability-zones/availability-zone/<OpenStack ZoneName> \

-H ‘accept: application/json’ \

-H ‘authorization: Basic QUFJOkFBSQ==’ \

-H ‘cache-control: no-cache’ \

-H ‘content-type: application/json’ \

-H ‘postman-token: 4e6e55b9-4d84-6429-67c4-8c96144d1c52’ \

-H ‘real-time: true’ \

-H ‘x-fromappid: AAI’ \

-H ‘x-transactionid: 9999’ \

-d ‘{

   “availability-zone-name”: “<OpenStack ZoneName>”,

   “hypervisor-type”: “<Hypervisor>”,

   “operational-status”: “Active”

}’

Step 6:  Register VIM/Cloud instance with SO
SO does not utilize the cloud region representation from A&AI. It stores information of the VIM/Cloud instances inside the container (in the case of OOM) as a configuration file. To add a VIM/Cloud instance to SO, log into the SO service container and then update the configuration file “/etc/mso/config.d/cloud_config.json” as needed.

Example steps to add VIM/cloud instance info to SO:

# Procedure for mso_pass(encrypted)

# Go to the below directory on the kubernetes server

/<shared nfs folder>/onap/mso/mso

# Then run:

$ MSO_ENCRYPTION_KEY=$(cat encryption.key)

$ echo -n “your password in cleartext” | openssl aes-128-ecb -e -K MSO_ENCRYPTION_KEY -nosalt | xxd -c 256 –p

# Need to take the output and put it against the mso_pass

# value in the json file below. Template for adding a new cloud

# site and the associate identity service

$ sudo docker exec -it <mso container id> bash

root@mso:/# vi /etc/mso/config.d/mso_config.json

“mso-po-adapter-config”:

   {

     “identity_services”:

     [

       {

         “dcp_clli1x”: “DEFAULT_KEYSTONE_Region1x”,

         “identity_url”: “<keystone auth URL https://<IP or Name>>/v2.0”,

         “mso_id”: “<OpenStack User Name>”,

         “mso_pass”: “<created above>”,

         “admin_tenant”: “service”,

         “member_role”: “admin”,

         “tenant_metadata”: “true”,

         “identity_server_type”: “KEYSTONE”,

         “identity_authentication_type”: “USERNAME_PASSWORD”

       },

“cloud_sites”:

     [

       {

         “id”: “Region1x”,

         “aic_version”: “2.5”,

         “lcp_clli”: “Region1x”,

         “region_id”: “<OpenStack Region>”,

         “identity_service_id”: “DEFAULT_KEYSTONE_Region1x”

       },

# Save the changes and Restart MSO container

# Check the new config

http://<mso-vm-ip>:8080/networks/rest/cloud/showConfig # Note output below should match parameters used in the CURL Commands

# Sample output:

Cloud Sites:

CloudSite: id=Region11, regionId=RegionOne, identityServiceId=DEFAULT_KEYSTONE_Region11, aic_version=2.5, clli=Region11

CloudSite: id=Region12, regionId=RegionOne, identityServiceId=DEFAULT_KEYSTONE_Region12, aic_version=2.5, clli=Region12

Cloud Identity Services:

Cloud Identity Service: id=DEFAULT_KEYSTONE_Region11, identityUrl=<URLv2.0, msoId=<OpenStackUserName1>, adminTenant=service, memberRole=admin, tenantMetadata=true, identityServerType=KEYSTONE, identityAuthenticationType=USERNAME_PASSWORD

Cloud Identity Service: id=DEFAULT_KEYSTONE_Regopm12, identityUrl=https://auth.vexxhost.net/v2.0, msoId=<OpenStackUserName2>, adminTenant=service, memberRole=admin, tenantMetadata=true, identityServerType=KEYSTONE, identityAuthenticationType=USERNAME_PASSWORD

Step 7: Change Robot service to operate with the VIM/Cloud instance
When using OOM, by default the Robot service supports the pre-populated cloud region where the cloud-owner is “CloudOwner” and cloud-region-id is specified via the parameters “openstack_region” during the deployment of the ONAP instance through OOM configuration files. This cloud region information can be updated in the file “/share/config/vm_properties.py” inside the robot container. Appropriate relationships between Cloud Regions and Services need to be setup in the same file for Robot Service Tests to pass.

Note:  Robot framework does not rely on Multi-VIM/ESR.

If you have done all 7 steps correctly, Robot tests should pass and both regions should appear in the VID GUI.

If you liked (or disliked) this blog, we’d love to hear from you. Please let us know. Also if you are looking for ONAP trainingprofessional services or development distros (basically an easy way to try out ONAP on Google Cloud in <1 hour), please contact us. Professional services include ONAP deployment, network service design/deployment, VNF onboarding, custom training etc.

References:

ONAP Wiki

vFWCL Wiki

Orchestrating Network Services Across Multiple OpenStack Regions Using ONAP (Part 1/2)

By Blog

Originally published on Aarna Networks, republished with permission.

NFV clouds are going to be distributed by their very nature. VNFs and applications will be distributed as per the below figure: horizontally across edge (access), regional datacenter (core) and hyperscale datacenters (could be public clouds) or vertically across multiple regional or hyperscale datacenters.

Distributed NFV Clouds

The Linux Foundation Open Network Automation Platform (ONAP) project is a management and orchestration software stack that automates network/SDN service deployment, lifecycle management and service assurance. For the above-mentioned reasons, ONAP is designed to support multiple cloud regions from the ground up.

In this two-part blog, we will walk you through the exact steps to register multiple cloud regions with ONAP for the virtual firewall (vFW) use-case that primarily utilizes SDC, SO, A&AI, VID and APP-C projects (other use cases will be similar but might require slightly different instructions). Try it out and let us know how it goes.

Prerequisites
  1. ONAP Installation (Amsterdam release)

  2. OpenStack regions spread across different physical locations

  3. Valid Subscriber already created under ONAP (e.g Demonstration2)

If you do not have the above, and still want to try this out, here are some alternatives:

ONAP Region Registration Steps

There are 3 locations where VIM/cloud instance information is stored: A&AI, SO & Robot. The following 7 steps outline the steps and provide sample API calls.

Step 1: Create Complex object(s) in AAI

A complex object in A&AI represent the physical location of a VIM/Cloud instance. Create a complex object for each OpenStack Region that needs to be configured under ONAP

Example script to do create complex object named clli1x:

# Main items to be changed are highlighted, but most of the below

# information should be customized for your region

curl -X PUT \ https://<AAI_VM1_IP>:8443/aai/v11/cloud-infrastructure/complexes/complex/clli1x \

-H ‘X-TransactionId: 9999’ \

-H ‘X-FromAppId: jimmy-postman’ \

-H ‘Real-Time: true’ \

-H ‘Authorization: Basic QUFJOkFBSQ==’ \

-H ‘Content-Type: application/json’ \

-H ‘Accept: application/json’ \

-H ‘Cache-Control: no-cache’ \

-H ‘Postman-Token: 734b5a2e-2a89-1cd3-596d-d69904bcda0a’ \

  -d   ‘{

           “physical-location-id”: “clli1x”,

           “data-center-code”: “example-data-center-code-val-6667”,

           “complex-name”: “clli1x”,

           “identity-url”: “example-identity-url-val-28399”,

           “physical-location-type”: “example-physical-location-type-val-28399”,

           “street1”: “example-street1-val-28399”,

           “street2”: “example-street2-val-28399”,

           “city”: “example-city-val-28399”,

           “state”: “example-state-val-28399”,

           “postal-code”: “example-postal-code-val-28399”,

           “country”: “example-country-val-28399”,

           “region”: “example-region-val-28399”,

           “latitude”: “example-latitude-val-28399”,

           “longitude”: “example-longitude-val-28399”,

           “elevation”: “example-elevation-val-28399”,

           “lata”: “example-lata-val-28399”

       }’

Step 2: Create Cloud Region object(s) in A&AI

The VIM/Cloud instance is represented as a cloud region object in A&AI and ESR. This representation will be used by VID, APP-C, VFC, DCAE, MultiVIM, etc. Create a cloud region object for each OpenStack Region.

Example script to create cloud region object for the same cloud region:

curl -X PUT \

‘https://<AAI_VM1_IP>:8443/aai/v11/cloud-infrastructure/cloud-regions/cloud-region/CloudOwner/Region1x \

 -H ‘accept: application/json’ \

 -H ‘authorization: Basic QUFJOkFBSQ==’ \

 -H ‘cache-control: no-cache’ \

 -H ‘content-type: application/json’ \

 -H ‘postman-token: f7c57ec5-ac01-7672-2014-d8dfad883cea’ \

 -H ‘real-time: true’ \

 -H ‘x-fromappid: jimmy-postman’ \

 -H ‘x-transactionid: 9999’ \

 -d ‘{

   “cloud-owner”: “CloudOwner”,

   “cloud-region-id”: “Region1x”,

   “cloud-type”: “openstack”,

   “owner-defined-type”: “t1”,

   “cloud-region-version”: “<OpenStack Version>”,

   “cloud-zone”: “<OpenStack Cloud Zone>”,

   “complex-name”: “clli1x”,

   “identity-url”: “<keystone auth URL https://<IP or Name>/v3>”,

   “sriov-automation”: false,

   “cloud-extra-info”: “”,

   “tenants”: {

       “tenant”: [

           {

               “tenant-id”: “<OpenStack Project ID>”,

               “tenant-name”: “<OpenStack Project Name>”

           }

       ]

   },

   “esr-system-info-list”:

   {

       “esr-system-info”:

       [

           {

               “esr-system-info-id”: “<Unique uuid, e.g. 432ac032-e996-41f2-84ed-9c7a1766eb29>”,

               “service-url”: “<keystone auth URL https://<IP or Name>/v3>”,

               “user-name”: “<OpenStack User Name>”,

               “password”: “<OpenStack Password>”,

               “system-type”: “VIM”,

               “ssl-cacert”: “”,

               “ssl-insecure”: true,

               “cloud-domain”: “Default”,

               “default-tenant”: “<Project Name>”

           }

       ]

   }

}’

Step 3: Associate each Cloud Region object with corresponding Complex Object
This needs to be setup for each cloud region with the corresponding complex object.

Example script to create the association:

curl -X PUT \ https://<AAI_VM1_IP>:8443/aai/v11/cloud-infrastructure/cloud-regions/cloud-region/CloudOwner/Region1x/relationship-list/relationship \

 -H ‘accept: application/json’ \

 -H ‘authorization: Basic QUFJOkFBSQ==’ \

 -H ‘cache-control: no-cache’ \

 -H ‘content-type: application/json’ \

 -H ‘postman-token: e68fd260-5cac-0570-9b48-c69c512b034f’ \

 -H ‘real-time: true’ \

 -H ‘x-fromappid: jimmy-postman’ \

 -H ‘x-transactionid: 9999’ \

 -d ‘{

   “related-to”: “complex”,

   “related-link”: “/aai/v11/cloud-infrastructure/complexes/complex/clli1x”,

   “relationship-data”: [{

           “relationship-key”: “complex.physical-location-id”,

           “relationship-value”: “clli1x”

   }]

}’

We will cover the remaining 4 steps in the next and final installment of this blog series.

In the meantime if you are looking for ONAP training, professional services or development distros (basically an easy way to try out ONAP < 1 hour), please contact us.

How service providers can use Kubernetes to scale NFV transformation

By Blog

This post originally appeared on LinkedIn. Republished with permission by Jason Hunt, Distinguished Engineer of IBM.

After attending two major industry events—IBM’s Think and the Linux Foundation’s Open Networking Summit (ONS)—I’ve been thinking about how software and networking are evolving and merging in a way that can really benefit service providers.

It’s been interesting to watch how NFV has changed over the past few years. At first, NFV dealt simply with virtualization of physical network elements. Then as network services grew from simple VNFs to more complex combinations of VNFs, ONAP came along to provide lifecycle management of those network functions. Now, with 5G on the doorstep, service providers will need to shift the way they approach NFV deployments yet again.

Why? As Verizon’s CEO Lowell McAdam told IBM’s CEO Ginni Rometty at IBM Think, 5G will deliver 1GB throughput to devices with 1ms of latency, while allowing service providers to connect 1,000 times more devices to every cell site. In order to support that, service providers need to deploy network functions at the edge, close to where those devices are located.

But accomplishing that kind of scale can’t be done manually. It has to be done through automation at every level. And for that, service providers can leverage the kind of enterprise-level container management that’s possible with Kubernetes. Kubernetes allows service providers to provision, manage, and scale applications across a cluster. It also allows them to abstract away the infrastructure resources needed by applications. In ONAP’s experience, running on top of Kubernetes, rather than virtual machines, can reduce installation time from hours or weeks to just 20 minutes.

At the same time, service providers are utilizing a hybrid mixture of public and private clouds to run their network workloads. However, many providers at ONS expressed frustration at the incompatibility across clouds’ infrastructure provisioning APIs. This lack of harmonization is hampering their ability to deploy and scale NFV when and where needed.

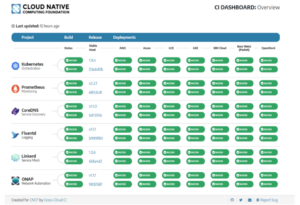
Again, Kubernetes can help service providers meet this challenge. Since Kubernetes is supported across nearly all clouds, it can expose a common way to deploy workloads. Arpit Joshipura, GM Networking at the Linux Foundation, demonstrated this harmonization on the ONS keynote stage. With help from the Cloud-CI project in the Cloud Native Computing Foundation (CNCF), Arpit showed ONAP being deployed across public and private clouds (including IBM Cloud) and bare metal. Talk about multi-cloud!

Last October, IBM announced IBM Cloud Private, an integrated environment that enables you to design, develop, deploy and manage on-premises, containerized cloud applications behind your firewall. IBM Cloud Private includes Kubernetes, a private image repository, a management console and monitoring frameworks. We’ve documented how ONAP can be deployed on IBM Cloud Private, giving service providers a supported option for Kubernetes in an on-premises cloud.

At ONS, AT&T’s CTO Andre Fuetsch stated, “Software is the future of our network.” With 5G getting closer to the mainstream every day, the best-prepared service providers will look at how to combine the best of the software and network worlds together. Exploring the benefits of a Kubernetes-based environment might just be the best answer for their NFV deployment plans.